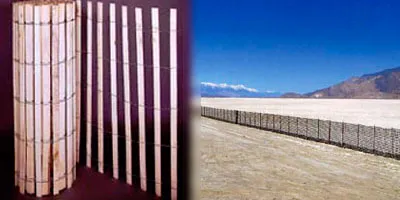
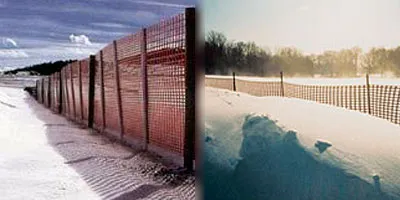
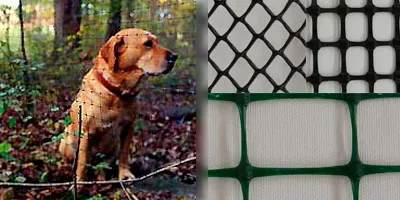
Snow fencing can eliminate the need for snow removal, lower pavement maintenance costs, and increase visibility and safety on the road. A well planned snow fencing program can save time and money. Following are installation instructions for snow fence.
How Snow Fencing Works:
Snow fencing reduces the wind speed, causing most blowing snow to fall behind the barrier. When the snow is at rest, the particles freeze together making a smooth snow drift.
Steps to Installation:
1. Research, determine variables
Snow fencing is designed for snow storage. A thorough knowledge of the problem is needed to estimate a sound solution.
- Wind Direction – This information can be found in meteorological data from weather stations, by examining drift features in area or aerial photographs, and by checking the orientation of vegetation, such as bent trees or snow-caused abrasion on wooden poles.
- Snow Transport – Estimate from wind speed records in the area. Keep in mind that in winds of less than 20 mph, 90% of the blown snow stays below 4 ft. In winds of less than 45 mph, 70% of the blowing snow remains below the 4 ft. mark.
- Snow Fall – Look up the records for past years and estimate snow fall records for the problem area.
2. Design
Design is critical to installing the most effective snow fencing for the area.
- Porosity refers to the open area of a fence. A porosity of 40-50% is recommended to form the largest drifts.
- Bottom Gap should be 10 - 15% of the fence height. Although in rough terrain or snow covered areas the bottom gap may be higher. This makes the fence less likely to be buried.
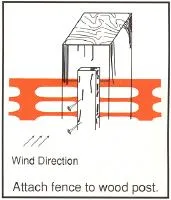
- Windy Conditions warrant the use of ties or wood strips to attach the fence to wood posts (see illustration).
- Anchoring the fence firmly is a necessity. In good soil, a six-foot fence post should be buried 2-1/2 ft.
3. Placement
Correct placement is essential in installing effective snow fencing. Incorrect placement can make the snow drift problem worse. Fence posts should be spaced no more than 8 feet apart for 4 ft. snow fences. End posts should be 6 ft. or less from the adjacent post. The end post placement facilitates bracing.
- Row – A drift can spread as far as 35 times the height of the fence. Therefore, the fence must be at least that far from the roadway and the distance may be farther because of irregular terrain. Also build the fence longer than the area that needs to be protected. Add 20 times the height of the fence on each end to account for wind variation.
- Alignment – Generally place the fence parallel to the road if the wind is within 25 degrees of being perpendicular to the roadway. If the wind direction is parallel to the road, fences should be placed perpendicular to the prevailing wind direction. Placement may vary up to 25 degrees to avoid adverse terrain or to take advantage of favorable topography.
- Multiple Rows – To avoid fence burial downwind leave 25 times the height in open area for snow drifts to form. With staggered fencing, make sure that all gaps are covered with following rows.
Maintenance
To ensure that the fence performs at its highest level, continual maintenance checks are essential. Check the anchoring system and look for missing and damaged parts periodically.
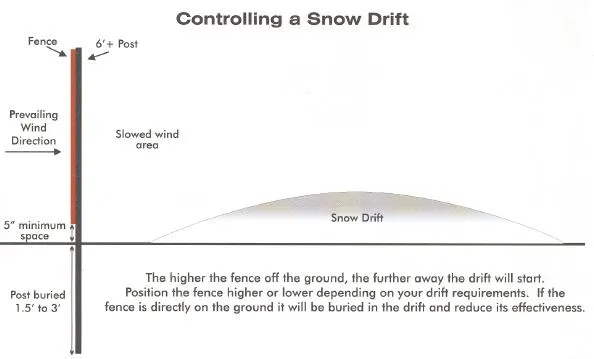
When snow blows and drifts on roadways or driveways, the end result often includes a reduction in driver safety, degradation of road quality, and significant removal costs for drifted snow. Snow fences are also used to trap snow in dugouts for water storage. The value of a snow fence is clear; however, exactly how one works is commonly misunderstood.
Snow fence is designed to CREATE drifts rather than to prevent them. Snow drifts form wherever the wind slows down, so the basics of drift control are (1) keep a blizzard wind moving, or (2) slow it down where you want the snowdrift. Snow fences act as windbreaks, causing blowing snow to be deposited as drifts where it is stored.

Proper installation is critical. Snow fence should be positioned upwind of the desired drift area, noting the prevailing wind direction. Posts should be strong as they will be the weakest link where tensile strength is concerned (metal U-posts should not be used). Bury posts 1/3 their height and place no more than 8 feet apart. The fence should be pulled taught, and support wires should stabilize end posts to prevent sagging. Fence should be attached to the upwind side of the post to minimize tearing. There should be a 5" minimum gap at the bottom of the fence to prevent burying. The higher the fence from the ground, the further away the drift will start.


